SOURCE-CHECKED · EVERYDAY TECH
Windows 11 virtual desktops: set them up around your windows
Arrange Windows 11 virtual desktops by window, fix mixed tabs and taskbar confusion, and plan your layout with a working offline worksheet.
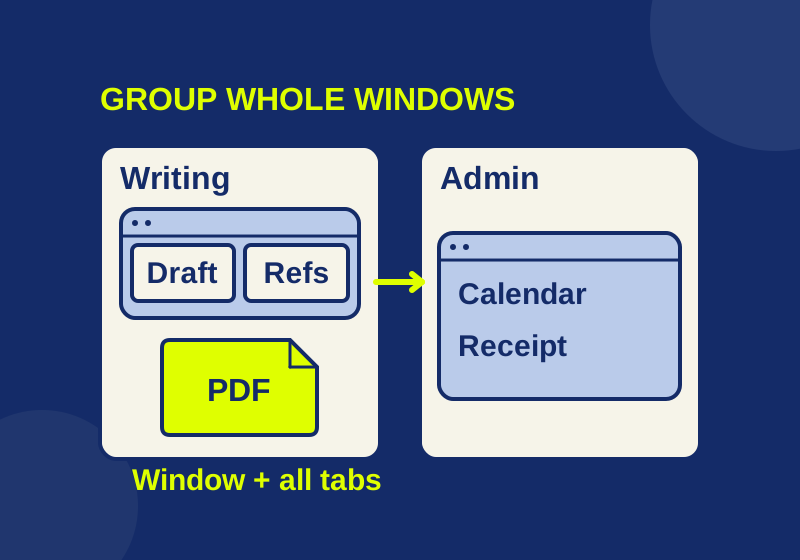
Press Windows+Tab, create a desktop, name it for a task, and move that task’s windows into it. The part that makes the arrangement useful is assigning whole windows. A browser window containing both research and a receipt will carry both tabs when you move it.
Start with two activities you switch between. In the example below, Writing contains a draft browser window and a reference PDF; Admin contains a separate browser window with a calendar and receipt. The offline window planner lets you try the arrangement and download a plan before touching your real Windows workspace.
Count windows, not app names
Writing “browser” beside both desktop names doesn’t tell you what to move. You need to distinguish the window with your draft from the window with your calendar. Each can belong to a different desktop even though both use the same app.
Look inside each window before assigning it. If one contains a reference tab for your draft and a receipt tab for an administrative task, split those into separate browser windows first. Task view moves the window as a unit. It doesn’t assign each of its tabs to a different desktop.
Group a reference with the work it supports. A PDF attached to an administrative email can still belong on Writing if you are consulting it while drafting. Using the file’s purpose avoids moving it to Admin simply because of where you received it.
For a side-by-side comparison, keep the two comparison windows on the same desktop. Splitting them between desktops would make you switch views to compare them. A separate desktop is useful for another activity you return to, while the windows needed at the same moment belong together.
Create two desktops and place the windows
Open Task view with Windows+Tab, select New desktop, and select its name to rename it. Use Writing and Admin for this exercise, or choose your own two activity names. Microsoft’s desktop setup instructions
Creating and naming Admin leaves you with a place for its windows. You still have to arrange the existing ones:
- Open Task view and find the calendar-and-receipt browser window’s thumbnail.
- Drag that thumbnail to Admin, or right-click the window and choose Move to, then Admin.
- Select Admin in Task view to check the placement.
- Return to Writing and check that the draft browser and reference PDF remain together.
Microsoft documents both dragging and Move to for transferring an open window. Microsoft’s multitasking instructions
Use those steps for the separate window you prepared, not for a mixed browser window that still contains the draft. The window’s contents determine whether the move gives you the separation you wanted.
Try the layout in the window planner
The planner starts with three fictional window cards across Writing and Admin. Each card lists the tabs or document inside its window. The dropdown beneath it changes the destination of the entire card.
Try moving the Writing browser card to Admin. Both its draft and reference tabs follow it in the worksheet. You now have one window on Writing and two on Admin, which also reveals why moving this particular window would put your draft in the wrong group.
Restore the sample when you have finished experimenting. To plan another administrative task, add a window labeled Browser: event booking, list Booking form and confirmation email as its contents, and assign it to Admin. Keep the draft and PDF together on Writing in your final plan.
The planner’s browser trial checked moving a whole card, adding a fourth window, downloading the text plan, and restoring the three-window sample. The downloaded file preserved the window labels, listed tabs, and selected desktop groups. These results describe the worksheet; it cannot read, move, open, or close your real Windows windows.
Use simple labels that let you recognize your windows. You don’t need to copy account names or URLs into the worksheet. Select Download my window plan before closing the page if you want to keep your assignments. The page holds edits in memory, so reloading restores the sample.
The downloaded text is your reference for making the actual moves in Task view. Windows doesn’t import this worksheet as a desktop configuration. You can also save the separate shortcut reference beside your plan.
Why the taskbar and Alt+Tab can still look mixed
Check Settings > System > Multitasking > Desktops. Windows lets the taskbar show open windows from the current desktop or all desktops. Alt+Tab’s desktop scope is a separate choice. Microsoft’s desktop display options
Choose the current desktop for each if you want those lists to follow your current group. Choose all desktops if quick access to every open window is more useful. You can make the choices independently; a taskbar preference need not match your Alt+Tab preference.
An icon or Alt+Tab entry appearing elsewhere can be a consequence of these settings. To check the window’s placement, inspect it in Task view. Changing a display preference won’t move the window to the other desktop for you.
Different picture backgrounds can help you recognize the groups. In Task view, right-click a desktop and choose Choose background. Microsoft specifies Picture for different backgrounds per desktop; slideshow and different solid colors don’t support that arrangement. Microsoft’s background instructions
Find the cause before rearranging everything
If a window is still in the wrong group, inspect its thumbnail in Task view and move that window. Renaming the desktop won’t fix its placement.
If the window is placed correctly but appears in your taskbar or Alt+Tab list elsewhere, review the two display preferences. Moving it again would address a different problem.
If one tab belongs to the other activity, separate the browser windows first. Moving the existing window would carry the other tabs with it, including the ones already in the correct place.
If windows appear elsewhere after you close a desktop, Microsoft says the open apps move to the next available desktop. Closing a desktop therefore differs from closing the app windows it held. Microsoft’s explanation of closing desktops
The shortcuts with different targets
| Shortcut | Action |
|---|---|
| Windows+Tab | Open Task view |
| Windows+Ctrl+D | Create another desktop |
| Windows+Ctrl+Left Arrow | Switch to the desktop on the left |
| Windows+Ctrl+Right Arrow | Switch to the desktop on the right |
| Windows+Ctrl+F4 | Close the current desktop |
| Alt+F4 | Close the active item or app |
Keep the full key combinations distinct: Windows+Ctrl+F4 acts on the desktop, while Alt+F4 acts on the active item or app. Save document edits as usual before changing your workspace. Microsoft’s shortcut reference
Windows instructions were checked against Microsoft’s documentation on October 7, 2026. The functional browser trial covered the downloadable planner only; Windows Task view, keyboard shortcuts, and desktop settings were not directly tested.
KEEP GOING
More to explore.
SOURCE-CHECKEDEveryday tech
Change a Windows touchpad gesture that keeps switching apps
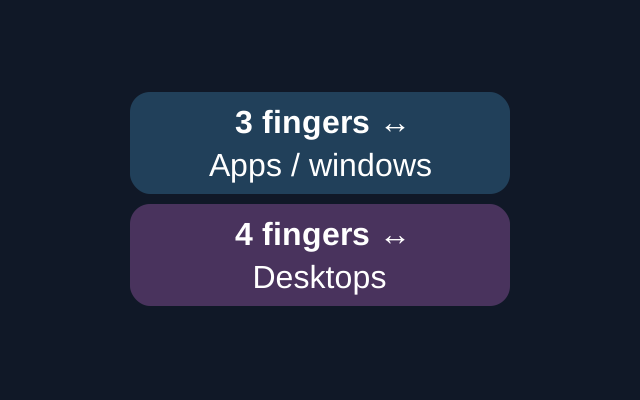
A sideways three-finger touchpad swipe switches between open apps or windows; four fingers switches desktops. Windows has separate settings for the two gestures.
SOURCE-CHECKEDEveryday tech
Dictate text with Windows Voice Access without triggering commands
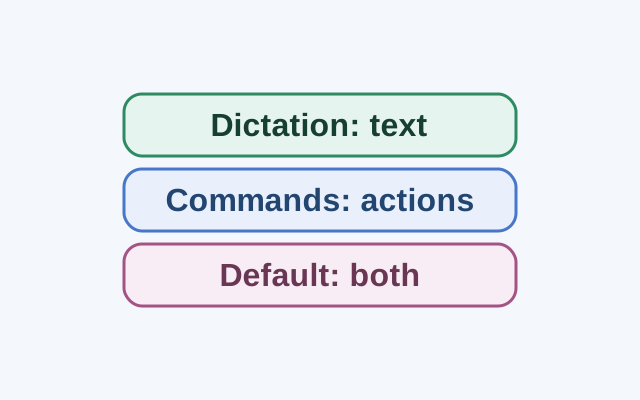
Dictation mode treats spoken input as text in an editable field. Commands mode is for actions; Default mode handles both commands and dictation.