SOURCE-CHECKED · EVERYDAY TECH
How to record part of your screen with Windows 11 Snipping Tool
Record a selected screen area with Windows 11 Snipping Tool and practice a complete menu demonstration with an interactive scene and actual framing examples.
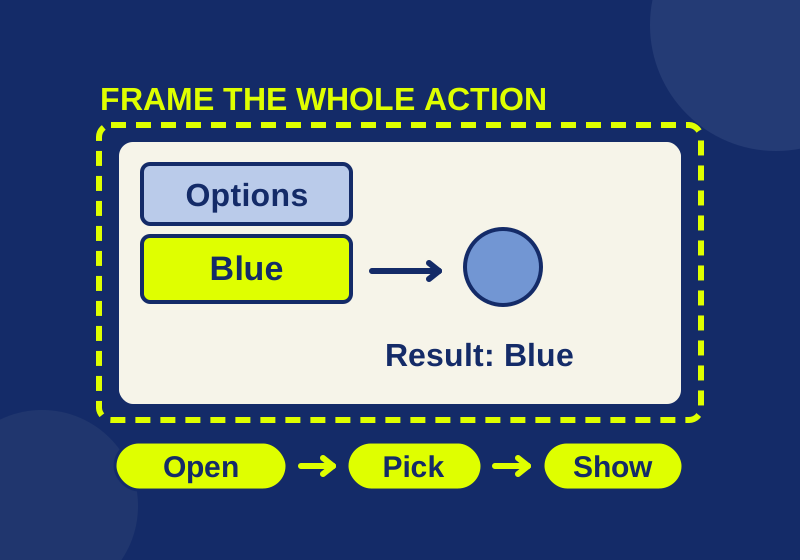
Press Windows + Shift + R on Windows 11 to start a video snip. Select the screen area, choose Start, perform the action, then choose Stop and save the clip. You can also open Snipping Tool and choose Record > New. Windows + Shift + S opens screenshot capture instead. Microsoft’s Snipping Tool guide
For a menu demonstration, the rectangle needs to include the button, the menu that opens, and the result of the selection. A clip can show a successful click yet leave the viewer unable to see which option you chose.
Practice a menu with a visible result
Open the recording rehearsal. This original fictional screen runs in your browser. It does not record, upload, or access your desktop, camera, or microphone. The task is to open Options, choose Blue, and show Selected color: Blue.
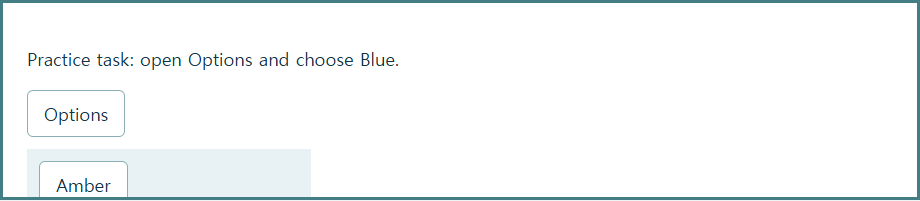
First choose Cramped frame, then open Options. The lower Blue item disappears below the demonstration area. This actual browser screenshot shows the result:
Choose Roomy frame while the menu remains open. Blue becomes visible, with space for the result line below it:
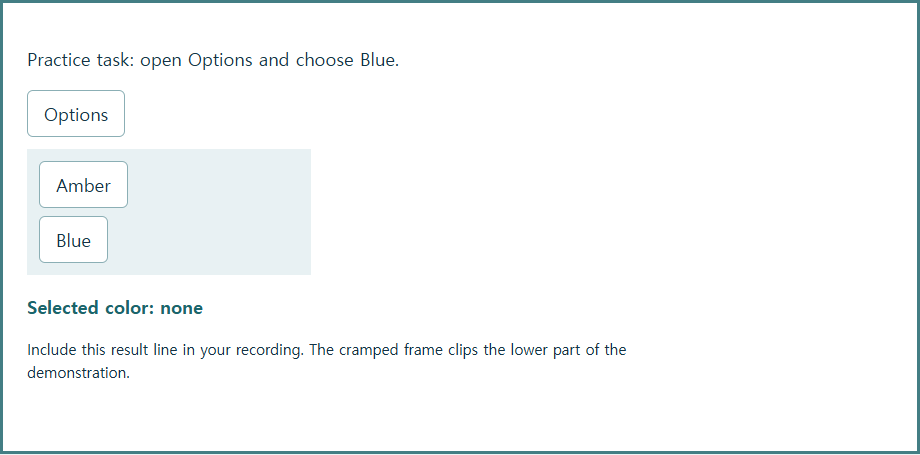
These frame controls change the practice page’s layout. They do not control Snipping Tool’s rectangle. The cramped view illustrates which content you lose when a demonstration is framed too tightly.
Choose Blue and look for Selected color: Blue. Now use Reset rehearsal. The menu closes and the result returns to Selected color: none. You have a reproducible starting point for another take, without navigating a real account or exposing personal files.
Select the area before recording the action
Choose Roomy frame and Reset rehearsal. Adjust your browser window or page size so the white demonstration area fits comfortably on the screen. Open Options once to see how far the menu extends, then reset again before recording.
Press Windows + Shift + R and draw the recording selection around the whole white demonstration area. Include the space occupied by the open menu and the result. The browser tabs are unnecessary for this fictional task.
A useful practice clip shows a connected sequence: Options, Blue, and Selected color: Blue. A recording that starts with the result already selected cannot explain how to reach it. A recording that ends at the click cannot show whether the page changed.
The following pauses are an editorial starting point for a readable support clip, not a measured recorder setting:
- Start with the menu closed and
Selected color: nonevisible. Hold this view for about two seconds. - Open Options and pause for about two seconds while Blue is visible.
- Choose Blue, move the pointer away from the result, and leave
Selected color: Bluevisible for about two seconds before stopping.
There is no requirement to hit an exact duration. Allow enough time for the relevant label to be read. If you resize the browser or move the demonstration after selecting the recording rectangle, select the area again. Extra recording time cannot recover a menu item that was outside the frame.
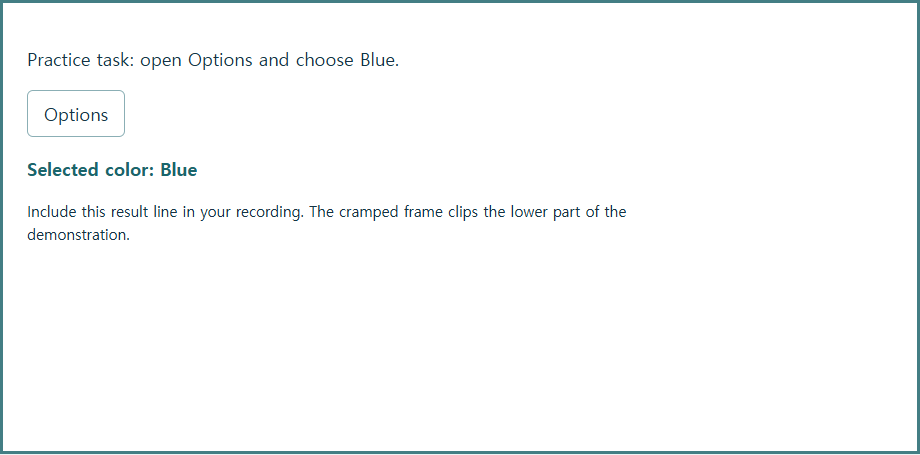
For your own app, replace the fictional color task with one question the viewer needs answered, such as where a particular option is located. Rehearse the entire action before selecting the rectangle. Check any dialog or confirmation that appears afterward, since it may need more space than the initial menu.
Save the clip and watch the actual file
After Stop, use the Save control and choose a recognizable filename and destination. Microsoft also documents Edit in Clipchamp after recording. Editing and captions can help explain the clip, but they cannot supply an option your rectangle never captured. Microsoft’s Snipping Tool guide
Open the saved file outside the editor and watch it from beginning to end. In the practice scene, Blue should be readable in the open menu and Selected color: Blue should appear before the clip ends. Confirm that the file you opened is the newly saved take, especially if you made several attempts.
If it is readable in your recording preview but difficult to follow in the saved video, check the actual sequence at the playback size your recipient will use. A missing result needs a new take. A pointer covering a short label needs a different pointer position. An earlier failed take needs the correct file selected before you share it.
Microsoft’s support page also discusses automatic saving of screenshots. That paragraph does not establish where this video was saved. Use the destination you selected and confirm that the file is there.
Sound needs its own short check
Microsoft introduced optional PC audio and microphone support in a 2023 Windows Insider update. That dated announcement does not establish which controls are present or active on your PC today.
If your demonstration depends on narration or an app sound, inspect the audio controls available before starting. Record a short sample of the intended sound and listen to the saved file. A correct visual selection does not establish that the microphone or PC audio was included. For a silent menu demonstration, the visible labels and result can carry the explanation.
Microsoft’s current guide describes adding captions through Clipchamp. Use that workflow if captions serve your viewer, and check that the resulting words match the menu labels. Captions should not claim that an invisible or unsuccessful action occurred.
Fix the specific problem in the clip
If you get a still image, check that you used Windows + Shift + R or Record > New. These instructions describe the Windows 11 recording feature. If Record is missing, compare your platform and app controls with Microsoft’s instructions before following a different recorder’s directions.
If Blue is outside the frame, return to Roomy frame and rehearse with the menu open before selecting the capture area. If the result never appears, reset and make another take that continues after choosing Blue. If you cannot find the output, explicitly save and open that file rather than relying on a preview that remains in the editor.
Keep private content out of the selected rectangle throughout the take. Another window or a notification can enter the area later. Use fictional data for a practice clip, and close private tabs and documents before a real demonstration. Stop if unexpected private content appears and withhold that take. Screenshot text-redaction features should not be assumed to remove information from moving video.
Microsoft’s recording instructions were checked on October 7, 2026. The rehearsal’s menu, color result, reset, clipping, and narrow-screen layout were checked in Chromium. Snipping Tool video and audio capture were not independently tested for this article.
KEEP GOING
More to explore.
SOURCE-CHECKEDEveryday tech
Have Edge read the part of a webpage you need
Edge can read a webpage aloud in its original layout. For a passage, select the text and open it in Reading mode before starting Read aloud.
SOURCE-CHECKEDEveryday tech
How to schedule Windows 11 Night light and check an orange screen
Schedule warmer display colors and use one fixed reference image to investigate an unexpected tint.