SOURCE-CHECKED · IMAGE WORKFLOWS
Remove an image background in Mac Preview and check transparent edges
Remove an image background in Mac Preview, preserve the original at a PNG conversion prompt, and inspect handle openings with downloadable cutout examples.
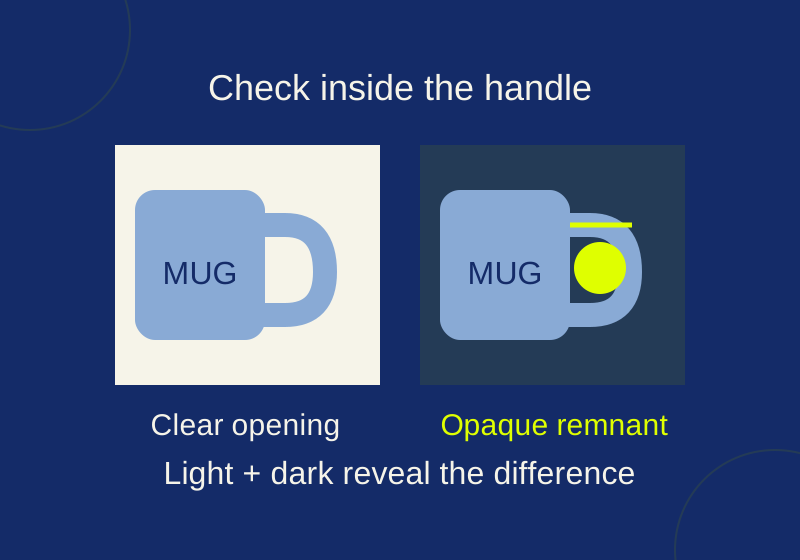
You can use Preview’s Remove Background command to make a mug cutout for a flyer. Before placing it, check two separate areas: the space around the mug and the opening inside its handle. A transparent outer edge does not mean the handle opening is transparent too.
Keep the original
Open the image in Preview and click Remove Background. Apple’s Preview guide says that if Preview asks to convert the image to PNG, you can choose Cancel, then use File > Duplicate to preserve the original before continuing. Choosing Convert changes the original. You can use Edit > Undo to reverse a removal.
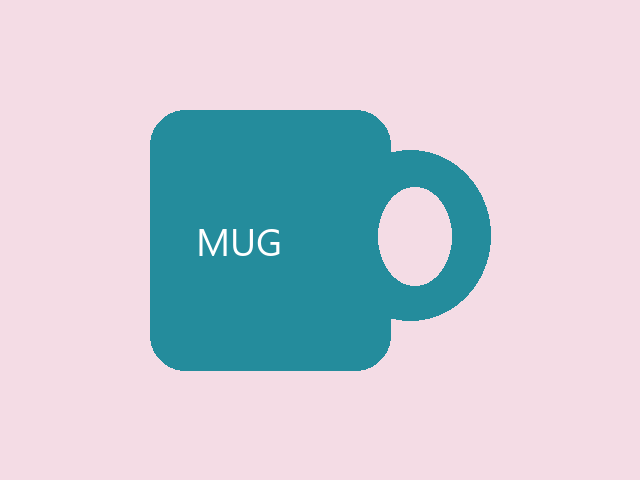
Keep an original and a separate cutout, with names such as mug-original.png and mug-cutout.png, so you can compare their shapes. The practice source image is a 640 × 480 drawing of a teal mug on pink. You can try it in Preview, but it is not a record of a Preview selection and does not promise an identical result.
Check the handle opening
Place the cutout over both a light and a dark background. Look through the handle as well as around the mug. In a transparent opening, the background behind the mug shows through. If pink remains inside the handle on both backgrounds, that part of the source background is still in the image.
These constructed reference images show the difference. They are drawings made for comparison, not Preview outputs.
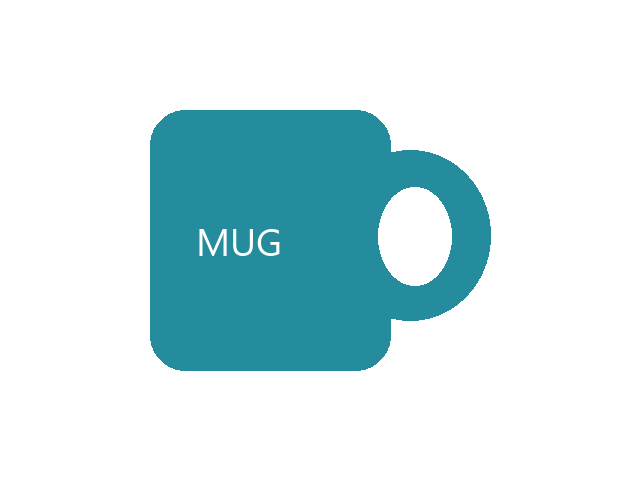
Reference cutout: the handle opening is transparent.
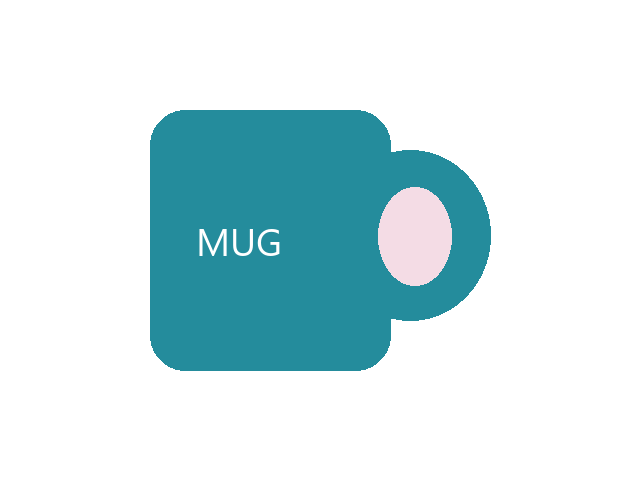
Faulty example: pink remains inside the handle.
You can also compare the light-background example and dark-background example. Open both to inspect the same cutout against different colors.
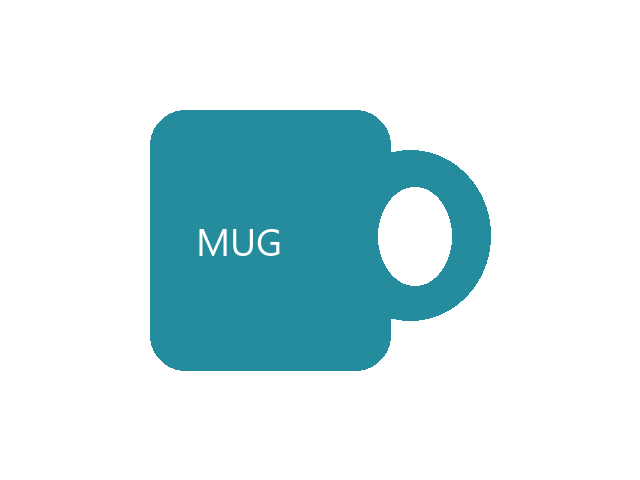
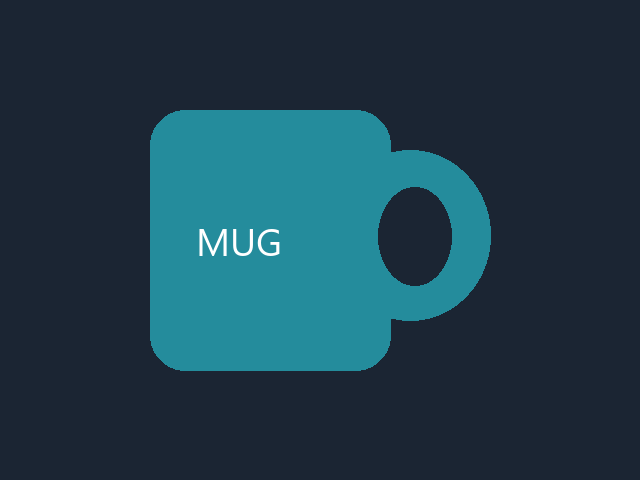
Compare the mug on the page where it will appear
For a flyer with a white header, open the light-background reference first. The clear handle opening takes the same white as the area around the mug. Then open the dark reference. Both areas take the dark page color while the teal body and white MUG lettering remain unchanged. The opening behaves like empty space in the layout.
Now compare the faulty cutout. It has a clear outer background, so the mug can appear to have been cut out successfully at first glance. Inside the handle, the old pink area is still opaque. Move that image to a different page color and the pink stays with the mug. Enlarging or shrinking the entire picture will change the size of the defect, but it will not make that area transparent.
You can use the same inspection on a shopping bag’s handles or the gap between a chair’s legs. Look for enclosed openings and narrow spaces, not just the outside silhouette. The example mug has one obvious opening, which makes it a useful practice image before working on a subject with several small gaps.
Keep the cutout reusable
Use a copy for the flyer and keep the transparent PNG as its own file. A finished page with a white background can look correct even when the placed image has been made opaque. That page is still useful for printing, but it does not replace the cutout you would need for a dark card later.
The practice source is already PNG, so it is useful for inspecting a cutout rather than demonstrating a JPEG-to-PNG conversion prompt. If your own source brings up the conversion question, decide whether to duplicate it before allowing a format change. A separately named file also gives you a fixed comparison when a later edit removes too much of the handle.
Inspect the small version on the flyer after checking the enlarged boundary. The shape may be intact while the white lettering becomes hard to read at the final size. That is a placement issue: enlarge the mug or give it more room. Repeating background removal would not make the lettering larger.
If the control is missing
The linked Apple guide includes a macOS version selector. Choose the version installed on your Mac before matching its instructions to Preview. The current page may describe controls differently from an older version. The source drawing supplied here is an ordinary PNG; opening it does not install a feature or change your app version. If your available controls differ, follow the selected guide or use its extraction instructions where applicable.
If the cutout needs another selection
Preview’s documented Smart Lasso can extract a portion of an image. Choose Show Markup Toolbar, open the Selection Tools menu, and select Smart Lasso. Trace the edge within the thick border. Connect back to the starting point, or stop dragging to make a straight closing segment, then use Edit > Copy to copy the selection for pasting.
This gives you a way to select a portion again if the mug’s shape was lost. Copying a Smart Lasso selection does not, by itself, create a finished PNG or guarantee that the handle opening has been cleared. Inspect the pasted result on light and dark backgrounds. Compare it with the original to see whether the mug body and handle are still intact.
Fix what you see on the flyer
If the cutout appears as a white rectangle over a dark flyer, check the image’s outer area on a dark background. White in that area may be part of the image rather than the flyer showing through. If the handle opening stays pink, inspect that opening specifically; a clear outer edge will not fix it. If part of the mug or handle is missing, compare the cutout with the original before using it.
A white page can also make a correctly transparent opening look white. Move the image over a darker area to tell. Likewise, a checkerboard painted into an image is just a pattern; it is not proof of transparency.
Keep a PNG cutout for reuse. MDN’s image-format guide describes PNG support for an alpha channel, which stores transparency, while JPEG does not support transparency. If someone needs JPEG, make an opaque copy with the intended background. The practice drawings have hard edges, so they cannot demonstrate how Preview will handle soft edges or hair in a photograph.
Source and test note: Apple’s linked guide supplies the Preview steps; no Mac or Preview run is recorded here. The linked images are independently constructed reference PNGs. Pixel checks on October 7 confirmed transparent outer and handle pixels in the reference and opaque pink in the faulty handle opening.
KEEP GOING
More to explore.
SOURCE-CHECKEDImage workflows
How to check image dimensions on a Mac and fix upload size mistakes
Two files can have the same pixels at different print resolutions. Check the saved image against the upload rule.
SOURCE-CHECKEDImage workflows
Make a photo attachment smaller in Mac Preview
Compare pixel resizing, JPEG quality, actual bytes, and the detail that must survive in your email copy.